
Overview
This is a post describing how I set up Jekyll on Github. It took me a while to understand how to use Jekyll because I had been using WordPress for a long while.
The one thing that I needed to get my head around is how Jekyll really worked. This is because by default there is no comments that is included in Github Pages/Jekyll. You can however integrate other commenting systems into Jekyll. Then I realised that unlike WordPress, which you post in to a database from a web input form, you add content into a special branch (typically master) where Jekyll will then read and then publish.
Templating
So my first task was to change the existing template. I have seen a few templates around and there were some that I liked. The one that I really liked is called Jekyll-Uno. I like this template because of it’s simplistic design and because it has integration with disqus for commenting.
The organisation of a typical Jekyll templating repository is like so:
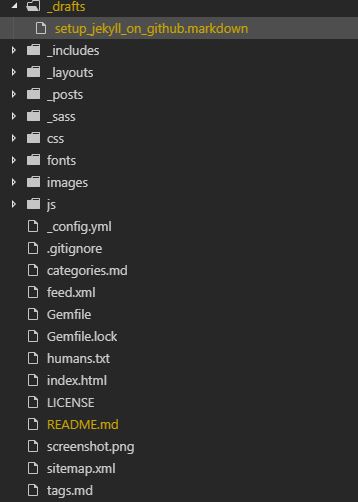
You would only really post to the _drafts folder under seperate branches and then move and merge them to the publishing branch when you finish.
To start writing a post , we use this notation below to start a blog post as an example.
---
title:  "Title"
comments: true
date:   2019-07-21 21:48:23
categories: [jekyll]
tags: [howto]
---
If there is a tag or categories html page in the layouts then most likely the author has programmed Jekyll to capture the categories and tags and organise them in a summary view.
Commenting System
There is no inbuilt commenting in Jekyll like Wordpress. However you can integrate external commenting systems into Jekyll. In this case I used Disqus. So you have to create a Disqus account.
Fill in the details and website name and category in disqus. Once you created put the name of your disqus name into your disqus_shortname variable in _config.yml in the root directory of the repository. In config.yml you use:
disqus_shortname: https-weiyentan-github-io
under site setting.
I hope that helps anyone that is planning to use Github Pages.